Showing posts with label Old White. Show all posts

Friday, September 23, 2011

Refinishing Decision and a Cane Chair

I need to stop looking on Craigslist or I need a workshop! I see quite a few things that I would love to purchase but I have no where to store anything. As it is my den area looks reminiscent of a Sanford and Son episode. I mentioned earlier that I purchased a Henredon Table and 10 Henredon chairs off of Craigslist. I had the table and chairs outside ( shaded area) for about a week until I could make room for them in my garage but then it rained. Yes, it rained in San Diego in September. Thankfully one of my daughter's friends was getting picked up right as it started and her dad helped me get everything inside. I love the table and I have been afraid to start the refinishing on it. I contacted Henredon to see if I could get any information on the table and chairs. I sent them a picture and the numbers that were under the table. They got back to me the next day and they told me the table was from their Capri collection manufactured between 1968 and 1976. The table and the chairs are solid pecan wood and the table has a cherry veneer facing. It was so neat to be able to get that information but they stressed not to use harsh refinishing products on the table. I have been flip flopping back and forth as to what exactly I would like to do with the table. My plan was to refinish the table top with a wood stain and paint the table legs white like my Oak table however, I am starting to really love the warmth of an entire wood table offset with white chairs. This is a bit of a problem, if the table top was in great condition I would just leave it as is, even though it is has the speckled finish it is actually nice looking.  There is no way I would be able to match a stain so I am contemplating trying to refinish and entire table. I know it can be done with time and patience's. I would love some input on this.
I started to strip off the caning from one of the chairs, which is a LOT of work. In a perfect world all the chairs cane backs would have been perfect but many were broken. I really had hoped the captains chairs would have been intact but they were not. I plan to recane just the captain's chairs and then upholstery the other chairs. So much work but the whole set was $95, and I know I will enjoy working on it. Here is the picture again for reference:

Well prior to finding the Henredon I bought the oak table and I found other cane back chairs. I finally got around to competing one of those chairs. I am happy with how it turned out. I used Annie Sloan's Paris Gray and Old White but instead of mixing the two colors together I dipped the end of the brush in each color. I used clear and dark wax and did a light distressing. I covered the seat using a canvas drop cloth. I did not sew the seat the way it was but I do plan to do that with the Henredon Chairs..
I would really love your feed back and input as to what I should do with the Henredon table, should I go with my original plan of refinishing the tabletop and painting the rest white, or go with what I am being drawn to know a whole refinished table look? Do you have any experience refinishing an entire table and if so what advice would you give?

Here is the before picture of the random cane chair I have:

                             and the after                          


Linking:


Photobucket

Funky Junk's Saturday Nite Special

Wednesday, September 7, 2011

Grain Sack Wanna Be..

Vintage grain sacks seem to be a big part of the French country look. People are using them to make pillows, purses, framed art, seat covers and many other projects. I do not have access to vintage grain sacks and if I did I don't think I would want to pay for them. I have seen a lot of DIY'ers making their own grain sacks by using graphics from the Graphic Fairy and fabric.
While cleaning up my garage I spotted a frame that I had purchased a few years back. This frame had a fun vintage like apple farm picture. It accidentally got left outside for quite some and the rain ruined the picture. I didn't want to throw the frame away because I thought maybe someday I would do something with it. When I saw it I thought the framed grain sack idea would be perfect. I do not have a before picture because I painted it before I remembered to take one. The frame was already a pretty Robin's Egg blue but I wanted it to be black, so I painted one layer of Old White Chalk Paint and over that I painted one layer of Graphite. I printed up this image from the Graphic Fairy:


If you click on the image it will take you to the Graphic Fairy and a towel project, which I hope to try out. I liked the look of the grain sacks that have the lines on them, so I taped up the drop cloth I was using to section off lines. I mixed a bit of Aubusson Blue, Versailles, and just a splash of Old White to make a greenish blue color. I then painted the lines waited for them to dry and got to work on the image. I had hoped to use a Freezer Paper transfer technique like this one: http://gardenberger.blogspot.com/2011/09/freezer-paper-transfer-tutorial.html but my printer is a laser printer. From what I have read, laser printers will not work ( I do have an old ink jet so I will dig that out for my future crafts). Instead I used a projector to project the image on to the drop cloth and painted the image using acrylic paint. This was tedious, and in the future I will back the fabric with spray adhesive and maybe cardboard to give it a hard surface to paint on. I didn't do this and the brush just didn't paint well. Learning as I go is becoming my motto! Once that was all dry I took a little bit of sandpaper to try and age it and then I stapled the cloth to the frame. This honestly was the hardest part, I could not for the life of me get it straight. So the image is a little wonky, which will drive me nuts. I will again in the future stabilize the material first, then paint. I have to say if it wasn't for the crookedness of the lines, I would be pleased with the outcome of this project. I will re-do it in the future, but not today! As always, I welcome helpful tips and tricks that you may have.


If there is any doubt how wonderful this could look here is some actual Grain Sack Eye Candy for you!


Linking to:


Photobucket


Photobucket


Funky Junk's Saturday Nite Special


Monday, August 29, 2011

$25 Oak Table Turned Beautiful!!

Little Disclaimer: I think my blog should be renamed My Creative Pink's Mishaps and redo's!!!

IT'S DONE!!! This table is the second piece of furniture I have purchased off of Craigslist and I purchased it for $25. I bought it because of all the beautiful refinished tables I have seen and thought this would be a great practice piece. The table was actually a solid oak table, not veneer and was in good shape. I know nothing about refinishing furniture but there is so much information on the Internet that I got to work searching out ideas. I of course looked at Miss Mustard Seed's information on table stripping and refinishing. I also found Lauren's blog First Comes Love where she refinished a table and I used the stripper she used. I knew exactly how I wanted to finish this table, dark stained top and creamy white pedestal. There is no shortage of inspiration for this look. I went out and bought a little palm sander (I have since decided to look for a more macho sander), Citristrip Varnish remover, gloves, mask, different courses of sand paper and wood stain. I noticed that many people use Minwax Dark Walnut stain so naturally I purchased this. Things started out really well and the Citristrip seemed to really work.


Once the table was stripped I sanded the table smooth and I got out the wood stain. I started to apply the stain with a rag but I didn't do it exactly right. As I was applying the stain I was also wiping it off vs. applying it liberally, letting it sit, and then wiping it off. Either way it looked good. The next day I went back and applied the second coat as per the directions, leaving it sit over night. This is where things went wrong. I wish I would have saved the pictures I had taken to show you but basically the table wasn't looking so great. First I could see variations in the way the stain was taking and I could see sanding marks. Not scratches but the marks from the sander itself. Then to make matter's worse the stain was weeping out of the chevron's in the grain. All over the table it looked like I had taken a spray bottle and sprayed stain all over the table. What?? I wiped it away, went on-line to figure this out, and found some instructions on Minwax to use a clean bristle brush with mineral spirits and scrub up the stain. I can't find the link now but that is what I did. I waited a few more days and it still seemed to still be doing this, not as much though. To top that off I was disappointed in the the color. It seemed dull to me, not the rich look that I had seen on other's projects and the end grain (the lip of the table top) was so much darker.  Now what? I decided to take the leaf from the table to Rockler a woodshop hardware store. They were very helpful and when I told them which stain I was using 2 people on 2 different days said it wasn't a good stain. I said that can't be, everyone uses it and they said it was a well advertised. They directed me to use General Finishes Gel Stain and although this is my first time ever re-staining a table and I am no expert, this stain was a huge difference right from the get go!! It was amazing, but before I could see just how amazing it was I had to sand so much.. so tiring. Finally the reward of applying stain. I applied the stain with a rag and it went on so smooth like butter and wiped off just as smooth. The first coat wasn't enough and so I ended up applying 3 coats of the Java color, but I knew with the first few swipes of Java that this was a rich, beautiful color. Once the table was stained I had my husband unscrew the table top so that I could paint the pedestal base. I used Annie Sloan Old White Chalk Paint. Of course if you have read my blog, NOTHING goes smoothly for me. The first coat dried and I was able to see various small cracks in the pedestal (nothing that hurts the stability) so I went back with wood filler. I also was able to see little dots of bleed through from the pedestal underneath.. seriously!! Now if your are reading this and aren't familiar with Annie Sloan Chalk Paint then you should know it is fabulous!! What makes it so? No sanding, no priming, just grab your brush and go. It covers over everything but occasionally there will be a bleed through and well if it is to be, then it would be so with me.  I went back and sanded in those areas, repainted, only to see the bleed though again. I then went in with some clear wax, waxed, repainted, and the result was only a small area still showed through. I finished the table with a few more coats, waxed, distressed, dark waxed, and finished!!
Well not quite, I still needed to apply the top coat on the table top. If this post seems like forever, it is because this table feels like it took forever! When reading other blogs you see the transformations but not the many hours behind those transformations.
For my top coat I used Polyurethane Gel Wipe-on Satin Clear Coat purchased at Rockler and I have applied 5 coats. This is a very helpful instruction that I found on how to apply wipe-on poly. Read it if you plan on using wipe-on.
I finished that last coat last night and will apply a clear wax in a few weeks for added protection. I will have recap at the end of this post but first enjoy the beauty shots.


Here is a recap of what I have learned and maybe it will help you with your project:


  • It is very important to make sure the previous varnish is completely removed. It may look and feel as though it is but make certain.
  • Clean the table thoroughly with Mineral Spirits using a stripping pad or fine steel wool to remove any remnants from the stripper.
  • Sand, Sand, and Sand some more. I was working with a solid oak table and didn't have to worry about a veneer. Please keep that in mind when working with a veneer top. I used 80 grit, 100 grit, 120 grit, 150 grit, and finally 180 grit.
  • On the last sanding (min was with 180 grit) sand by hand using a sanding block. This will sand away the various palm sander marks.
  • Clean away all the sanding dust with a tack cloth, I also went back in with a cloth slightly dampened with mineral spirits.
  • Seal the end grain of the table, this will always stain darker. I used the Polyurethane gel on recommendation from the guys at Rockler. I wiped it on the lip end of the table and let it dry. it prevented it from getting too dark  when the stain was applied and the table top matches perfectly.
  • Read directions, and read them again. With everything I read, when I went back to double check the instructions I caught something different.
  • I strongly suggest reading the link above on the technique to applying the varnish.
With the Annie Sloan Chalk Paint:
  • Cut the paint with water. I didn't do this with this project or my chair and the can of paint went very quickly. I did this with my secretary and got beautiful coverage using less paint. It may take a few more coats but it is still using less paint. This stuff is expensive and it is awesome it can be stretched with water.
  • Clean older pieces more then a dusting. Older stains can seep through. I used paint thinner when cleaning my secretary and this was a much older piece. There was no bleed through. If I had done this with the table maybe the bleed through wouldn't have happen or maybe it would have.


Misc. Bullet Points:
  • Just because it worked for everyone else doesn't mean it is meant to work for you.
  • It will take longer to complete your project then it was to read this post, I know hard to believe!
  • And Lastly, enjoy yourself. It might be frustrating and you might discover you have super hero strength when you pick up your project and heave it across the room but the end result can be very rewarding as is my brand new table.
and just to prove just how fun this is:


Stay tuned!

Thank you so much for stopping by!

Linking to:


Photobucket

Thursday, August 4, 2011

We got the house, oh wait no we didn't!

One of the reason's I started to search out decorating blogs was because we put an offer on a house 2 months ago. Over the course of my marriage we have owned one home, sold that home, rented our current home, and have looked at a gazillion other homes. Honestly, all the "For Sale" homes should be a blur in my head, we have looked at so many. But it isn't a blur, it is very clear. We have looked at beautiful brand new model homes that make your heart race because of how beautiful they are.  Of course these come with a large mortgage, and some annoying thing that raises your monthly cost some $700+/month called Mello Roos (it should be illegal). These house are amazing, they are big, beautiful and there is nothing small about those homes except of course the yard. We have looked at more budget friendly houses, some needing just paint, some needing big updates, and I think one the houses even had the Swamp thing living in it's pool (green, yucky, smelly!) In the mix of all this we went to go look at a house that was in an area that wasn't even in our radar. We had decided to look because it was a good price and we figured "why not?" I wish we would have just skipped it all together because we loved it, we made an offer, (it is a short sale house) and 2 month's later the bank just accepted it! At this point I should be so happy right? Well, for about 1 day I was and now I am disappointed. You see the house we sold was sold on a short sale, this was a good thing for us at the time however there is a law that doesn't allow you to get a new loan for 4 years. We were aware of the restrictions but at some point in the last 5 months we were given misinformation and we were told it changed to 2 years, so we started looking for a house. Well, yesterday we found out that there is a clause for the the 2 year limit and we  don't  qualification. So now this house can't be ours. I am sad, my heart really was set on this house. It was a house we could see being our forever house and out of all the houses we looked at, it was the only one. Not to mention I could be a DIY decorator again. 
I don't know how long we will be in this house that we are renting. The truth is, I have been very happy in this house. It has a beautiful back yard, it is in a wonderful neighborhood, and whenever there is  a link we don't have to pay for it. If I allow myself to remember how I felt when my husband said we were going to start looking for a house to buy, I was not happy. I don't like change and that would be a change, not to mention I was happy (am happy) in this house.   I have however decided that just because we are renting it doesn't mean I can't decorate. I am limited in one respect, paint, hanging curtains, couches but there is a lot more I can do and will do.

So with that, I am an official Craigslist addict! The great thing about that is, i have scored some great pieces of furniture for a great price. Two days ago I purchase a round solid oak table. I am so excited about this table because of the plans that I have for it, white pedestal base and dark walnut stained top. I have seen this look all over and just love it. My current dining table is also a round wood table that I purchased along with two chairs for $25 off of Craigslist 2 years ago. It isn't anything special and it has served it's purpose it isn't the prettiest thing to look at. When I take a look around my house I don't really see "me" style. In fact there really isn't much style at all. I have simply gotten into a renters funk. The house we bought when we first got married (6 years ago come August 14) I spent months, painting buying curtains and making it home. I enjoyed that so much and I miss it. My thoughts with renting has always been, why invest when it might not fit in our new home. I am changing that slightly because if I pay $25 dollars for a table and it doesn't fit later that is okay. Today, I purchased 4 cane back chairs for $55, that's $13.75/chair. These chairs have ugly corduroy fabric but the frames are solid, heavy, and in great shape. One of the chairs does have a section on the leg that is missing wood but I can work with that. That chair is also an arm chair, while the others are not but again they match. I will be painting these white to go with my table. I have found a few blogs that have given some great tutorials and once I come back with my progress updates I will share.
I have been diligently working on my two cane arm chairs that I bought earlier this week and I really didn't realize how difficult pulling off upholstery would be. The base of the chair was quite easy, 4 screws off the the base of the chair, lots of stables and I have a base board (with mildew, yucky!), a piece of foam that has a dent ( I will fill it with something), and fabric to make a pattern out of. The backing of the chair took a lot of sweat, and might to get off. You will notice in the picture below, the chair has a groove all around the backrest, well the not only was the piping stapled into the grooves, but the backing as well. This was very difficult to pull up, I did it though. There are staples still in that I could quite get to. I will say, there has not been any tears but I bought two of these chairs!
I cleaned the seat board today with tsp, and Clorox and spay painted them, not mildew yucky anymore. I have been paint the chairs with Annie Sloan's Old White Chalk paint. Now, I am not a painting expert but I feel like I had to put on many more coats then others seem to have needed. I have put on  3 coats and in some areas, all I see is white but in others the darkness of the wood is poking through. I suppose it is the nature of the paint (best when distressed) and my inexperience in painting furniture. I started to distress the chair today but I am flip-flopping as to the look I want for it. Many of the blogs I have happened upon have a very distinct French Antique, French Country, or Shabby Chic style. I absolutely adore that style and there are elements of that I want to use, like the table idea I have, the drop cloth decor, the french stencils and many other fabulous elements. My struggle is merging that with the style that I have been gravitating towards, which is a Beachy Chic (not cottage), East Hamptonesque look.


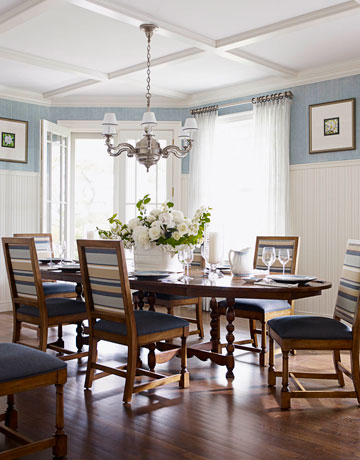
I love the clean, crisp, bright white, neutral background, with the pop of color, and the dark wood mixed with white wood, swoon! I have googled search French Beach, Beach French, Beachy French, Frenchy Beach, well you get the idea.
I would love input into the little decor conundrum.
Well, I will say I am leaning towards either putting Paris Grey or Duck Egg Blue over the Old White and then distress down to the old white in some areas and then to the wood in others. My struggle which color? I will leave you with a few pictures of my chair progress, along with one of my newly acquired cane chairs. I am happy to say, these will be so easy to reupholster and I will be able to pull out my sewing machine to do it.
Thanks for stopping by!
Painted, and some distressing

Cane chair love! Look at the leg detail..

Duck Egg Blue or Paris Gray (side by side)

Dry Brushed Duck Egg, not loving!

I appreciate the indecision a $15 chair can affored me!