One of the reason's I started to search out decorating blogs was because we put an offer on a house 2 months ago. Over the course of my marriage we have owned one home, sold that home, rented our current home, and have looked at a gazillion other homes. Honestly, all the "For Sale" homes should be a blur in my head, we have looked at so many. But it isn't a blur, it is very clear. We have looked at beautiful brand new model homes that make your heart race because of how beautiful they are. Of course these come with a large mortgage, and some annoying thing that raises your monthly cost some $700+/month called Mello Roos (it should be illegal). These house are amazing, they are big, beautiful and there is nothing small about those homes except of course the yard. We have looked at more budget friendly houses, some needing just paint, some needing big updates, and I think one the houses even had the Swamp thing living in it's pool (green, yucky, smelly!) In the mix of all this we went to go look at a house that was in an area that wasn't even in our radar. We had decided to look because it was a good price and we figured "why not?" I wish we would have just skipped it all together because we loved it, we made an offer, (it is a short sale house) and 2 month's later the bank just accepted it! At this point I should be so happy right? Well, for about 1 day I was and now I am disappointed. You see the house we sold was sold on a short sale, this was a good thing for us at the time however there is a law that doesn't allow you to get a new loan for 4 years. We were aware of the restrictions but at some point in the last 5 months we were given misinformation and we were told it changed to 2 years, so we started looking for a house. Well, yesterday we found out that there is a clause for the the 2 year limit and we don't qualification. So now this house can't be ours. I am sad, my heart really was set on this house. It was a house we could see being our forever house and out of all the houses we looked at, it was the only one. Not to mention I could be a DIY decorator again.
I don't know how long we will be in this house that we are renting. The truth is, I have been very happy in this house. It has a beautiful back yard, it is in a wonderful neighborhood, and whenever there is a link we don't have to pay for it. If I allow myself to remember how I felt when my husband said we were going to start looking for a house to buy, I was not happy. I don't like change and that would be a change, not to mention I was happy (am happy) in this house. I have however decided that just because we are renting it doesn't mean I can't decorate. I am limited in one respect, paint, hanging curtains, couches but there is a lot more I can do and will do.
So with that, I am an official Craigslist addict! The great thing about that is, i have scored some great pieces of furniture for a great price. Two days ago I purchase a round solid oak table. I am so excited about this table because of the plans that I have for it, white pedestal base and dark walnut stained top. I have seen this look all over and just love it. My current dining table is also a round wood table that I purchased along with two chairs for $25 off of Craigslist 2 years ago. It isn't anything special and it has served it's purpose it isn't the prettiest thing to look at. When I take a look around my house I don't really see "me" style. In fact there really isn't much style at all. I have simply gotten into a renters funk. The house we bought when we first got married (6 years ago come August 14) I spent months, painting buying curtains and making it home. I enjoyed that so much and I miss it. My thoughts with renting has always been, why invest when it might not fit in our new home. I am changing that slightly because if I pay $25 dollars for a table and it doesn't fit later that is okay. Today, I purchased 4 cane back chairs for $55, that's $13.75/chair. These chairs have ugly corduroy fabric but the frames are solid, heavy, and in great shape. One of the chairs does have a section on the leg that is missing wood but I can work with that. That chair is also an arm chair, while the others are not but again they match. I will be painting these white to go with my table. I have found a few blogs that have given some great tutorials and once I come back with my progress updates I will share.
I have been diligently working on my two cane arm chairs that I bought earlier this week and I really didn't realize how difficult pulling off upholstery would be. The base of the chair was quite easy, 4 screws off the the base of the chair, lots of stables and I have a base board (with mildew, yucky!), a piece of foam that has a dent ( I will fill it with something), and fabric to make a pattern out of. The backing of the chair took a lot of sweat, and might to get off. You will notice in the picture below, the chair has a groove all around the backrest, well the not only was the piping stapled into the grooves, but the backing as well. This was very difficult to pull up, I did it though. There are staples still in that I could quite get to. I will say, there has not been any tears but I bought two of these chairs!
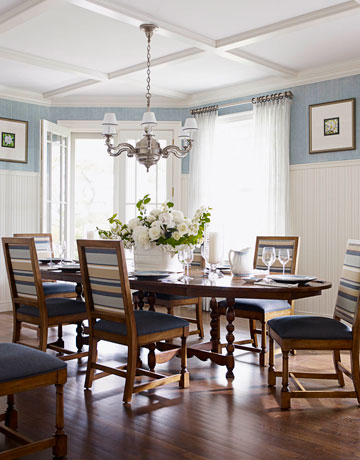
I cleaned the seat board today with tsp, and Clorox and spay painted them, not mildew yucky anymore. I have been paint the chairs with Annie Sloan's Old White Chalk paint. Now, I am not a painting expert but I feel like I had to put on many more coats then others seem to have needed. I have put on 3 coats and in some areas, all I see is white but in others the darkness of the wood is poking through. I suppose it is the nature of the paint (best when distressed) and my inexperience in painting furniture. I started to distress the chair today but I am flip-flopping as to the look I want for it. Many of the blogs I have happened upon have a very distinct French Antique, French Country, or Shabby Chic style. I absolutely adore that style and there are elements of that I want to use, like the table idea I have, the drop cloth decor, the french stencils and many other fabulous elements. My struggle is merging that with the style that I have been gravitating towards, which is a Beachy Chic (not cottage), East Hamptonesque look.


Painted, and some distressing
Cane chair love! Look at the leg detail..
Duck Egg Blue or Paris Gray (side by side)
Dry Brushed Duck Egg, not loving!
I appreciate the indecision a $15 chair can affored me!